

Zirconia Crown Prep Guide
Step-by-step placement protocol for KTR pediatric zirconia crowns. Select your crown type below.
Anterior crown preparation for primary incisors
|~20 min9 steps0/9 completedPreparation
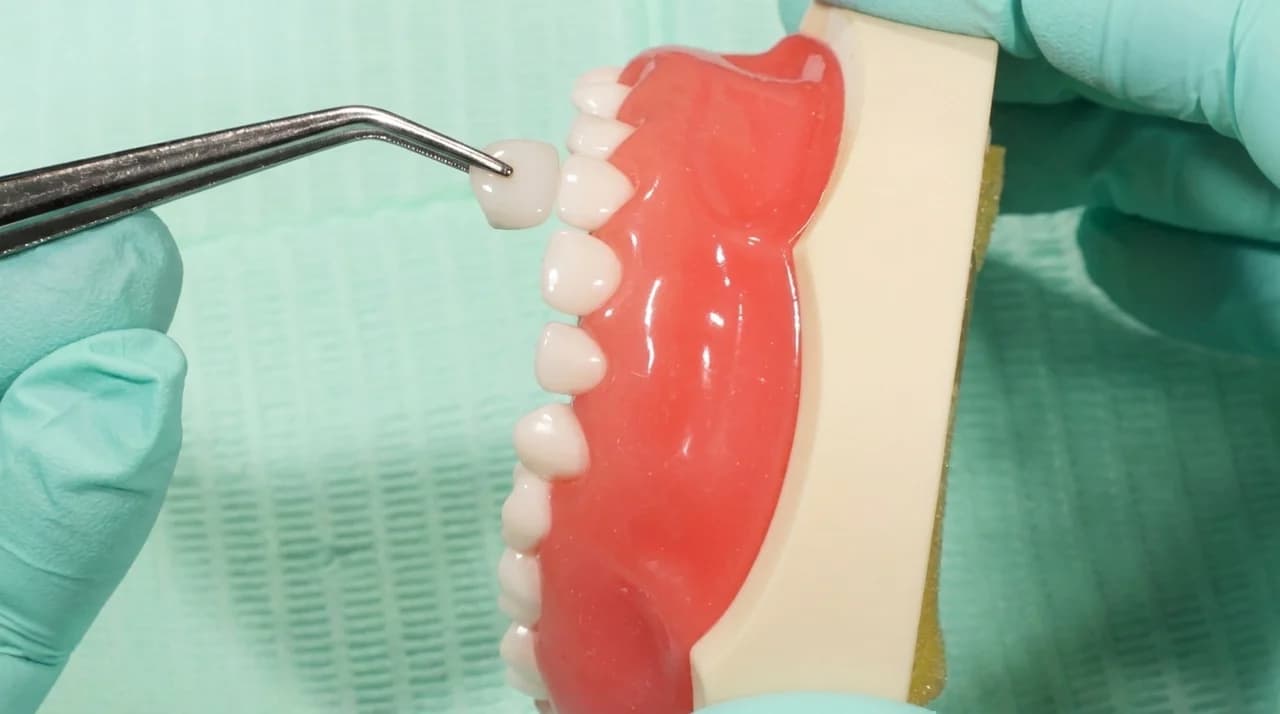
- 1.Select the crown before you begin the preparation, not after.
- 2.Hold candidate sizes against the unprepped tooth and compare size, shape, and contour.
- 3.Step up or down a size until one clearly matches the original tooth better than its neighbors.
- 4.Set the selected crown aside for try-in after the preparation is complete.
Tips
Selecting first gives you a reference for how much structure to remove.
Anterior crowns come in sizes 1-6 for each position. Having the sizes on either side of your pick ready reduces chair time.
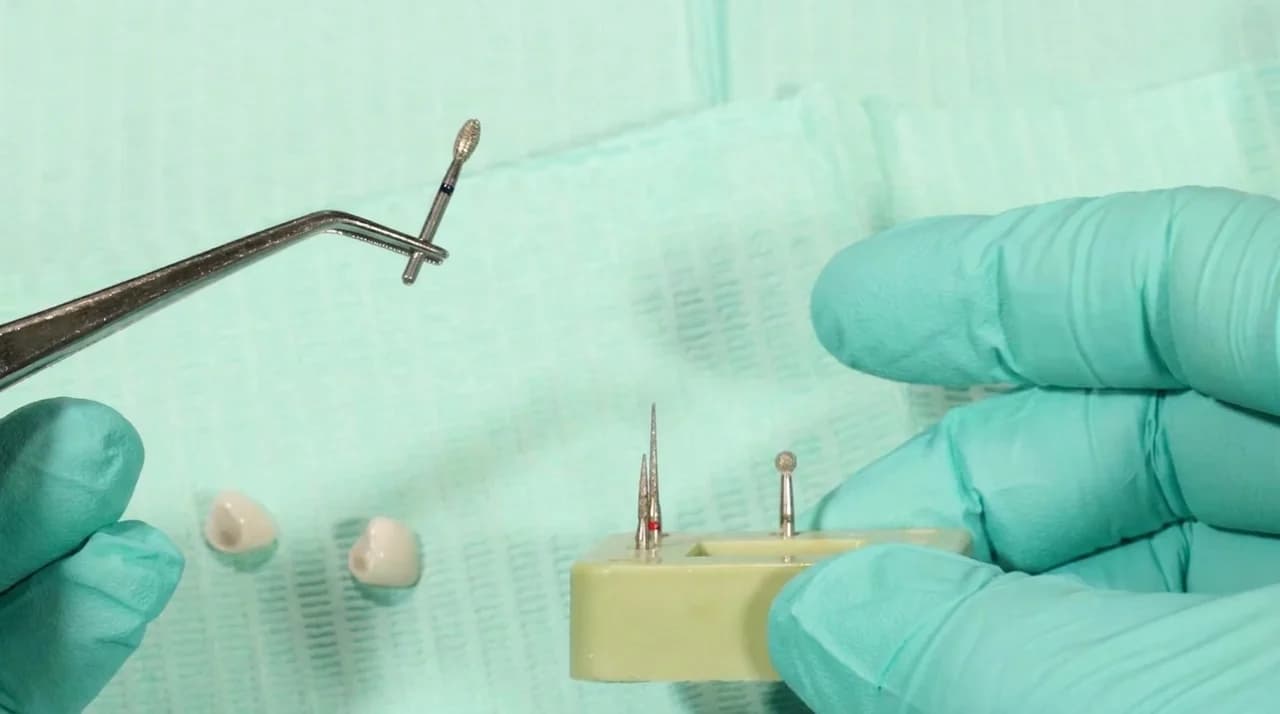
- 1.Diamond football bur: incisal reduction, cingulum reduction, and smoothing.
- 2.Diamond round bur / 016 chamfer bur: subgingival circumferential reduction.
- 3.Pencil-shaped flame-tipped finishing diamond bur: interproximal separation.
- 4.Medium-coarse flame-tipped diamond bur: bulk reduction as needed.
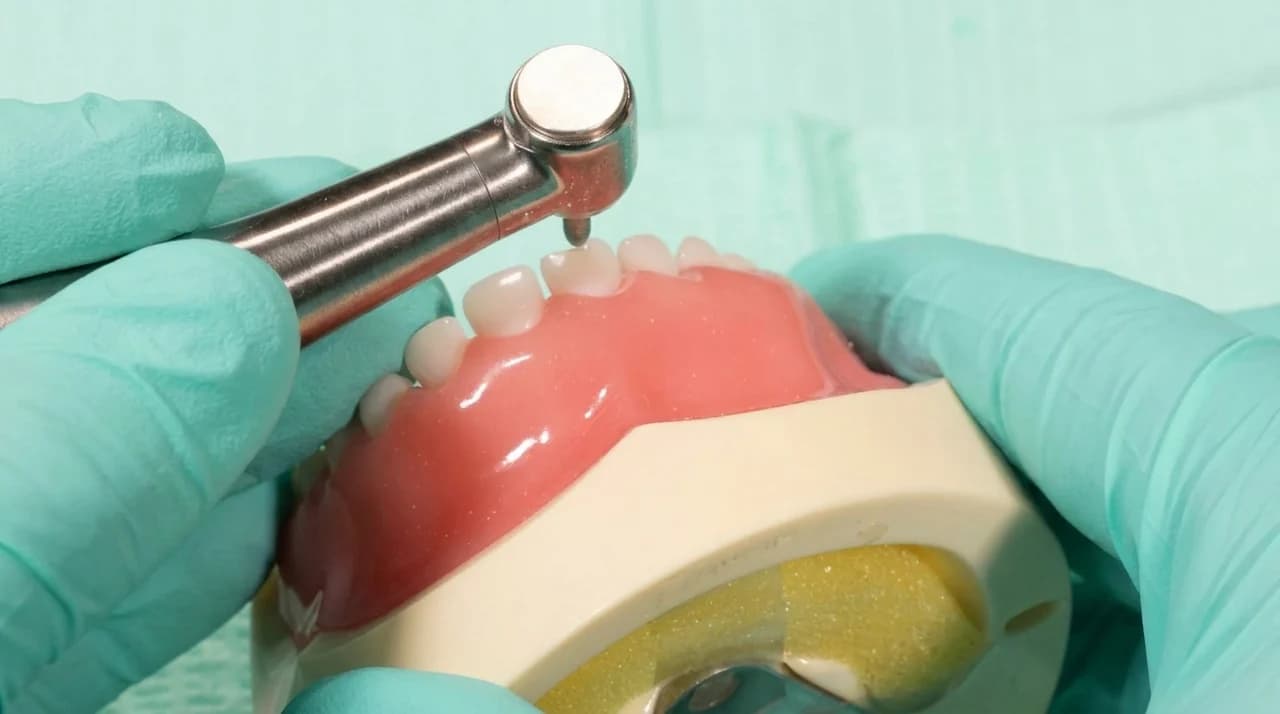
- 1.Use the football-shaped diamond bur for this initial part of the prep.
- 2.Remove approximately 2mm of the incisal edge.
- 3.Follow the natural incisal plane of the tooth.
Caution
Primary incisors are thin. Stay at the incisal edge and avoid over-reduction toward the pulp.
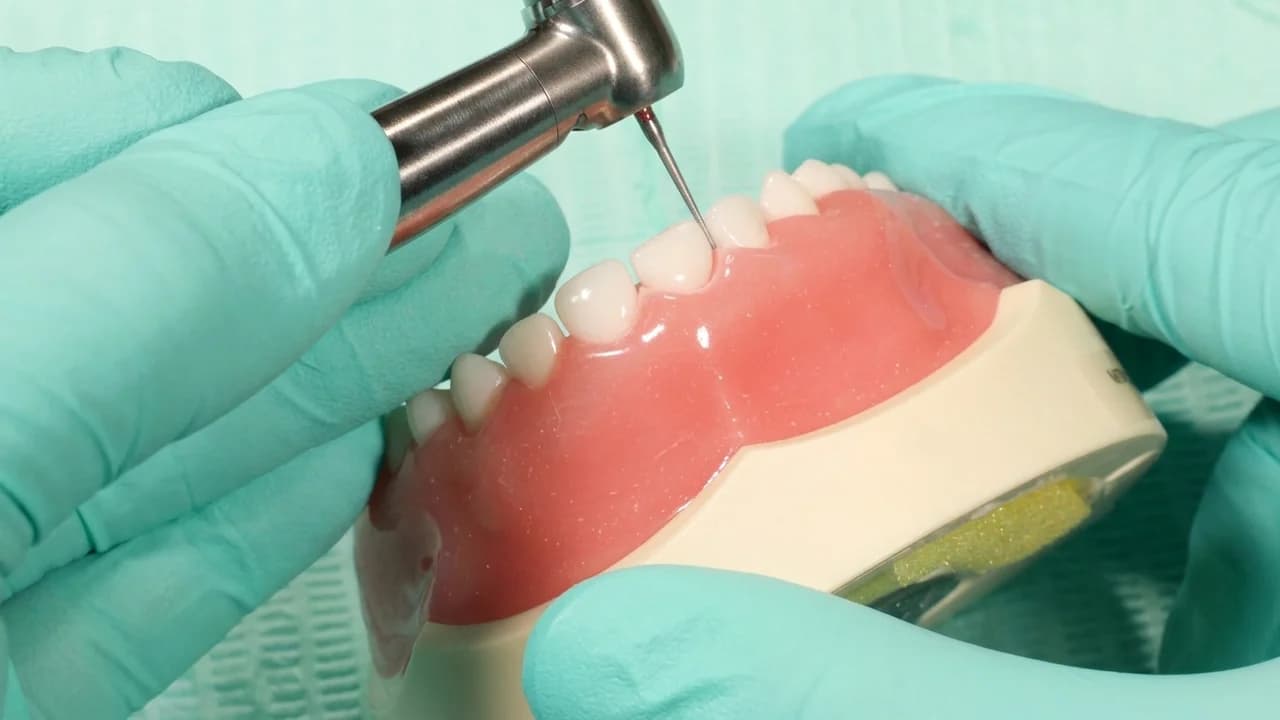
- 1.Switch to the pencil-shaped flame-tipped diamond bur.
- 2.Reduce the interproximal surfaces where contact exists with the adjacent teeth.
- 3.Take only what is needed to separate the contacts before moving to the chamfer.
Caution
Protect adjacent teeth during proximal slicing.
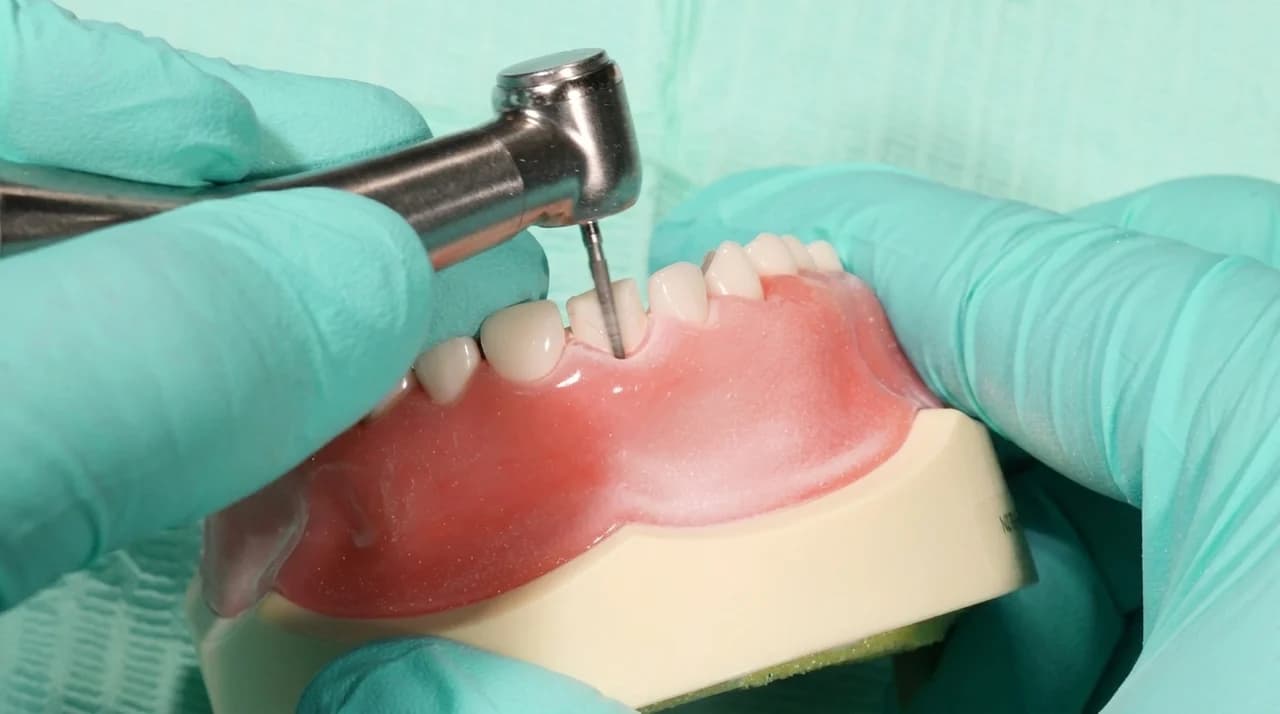
- 1.Switch to the diamond 016 chamfer bur once the contacts are separated.
- 2.Carry the reduction subgingivally around the entire tooth.
- 3.Hold the bur along the long axis of the tooth to produce a properly tapered preparation.
- 4.Watch the tissue roll away from the tooth rather than tear as you prep.
Tips
A round-shaped diamond or chamfer bur is preferred here. It allows subgingival prep with minimal tissue tear and minimal hemorrhage.
Caution
Do not leave a margin or ledge. A marginal ledge will prevent the crown from seating.
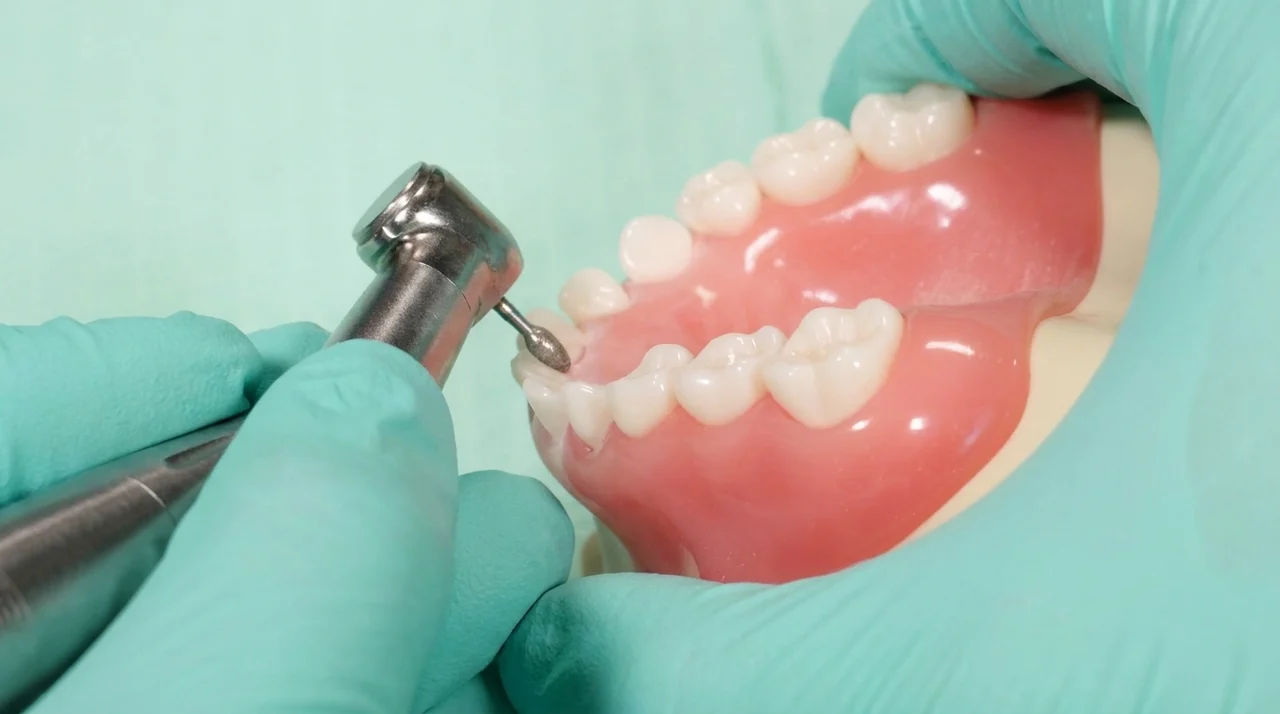
- 1.Go back to the football diamond bur and remove part of the cingulum area.
- 2.Use the same bur to slightly round off the rough edges of the preparation.
- 3.Confirm the finished reduction: about 2mm at the incisal edge and a smooth circular reduction around the entire tooth.
- 4.Verify there are no margins and no ledges anywhere on the preparation.
Caution
If marginal ledges are present, the crown will not seat properly. Remove them before try-in.
Fitting
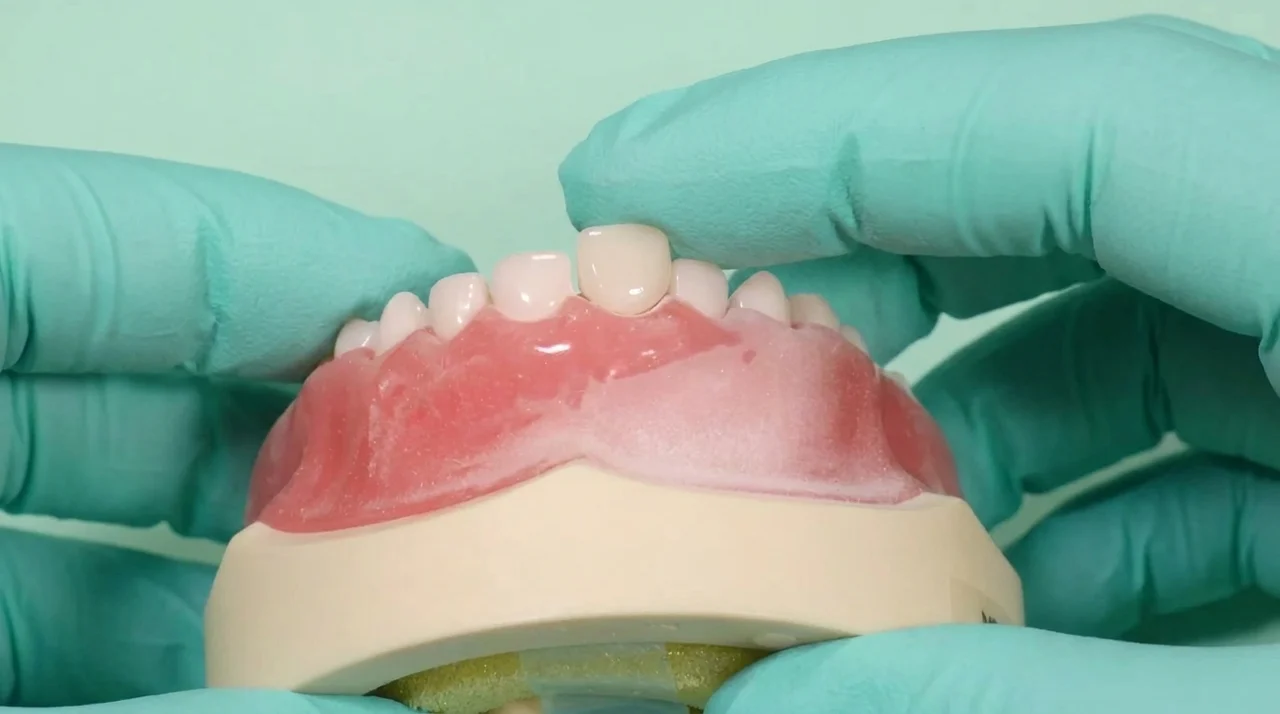
- 1.Try in the crown you selected before beginning the preparation.
- 2.The crown should seat passively, without force.
- 3.Check that the incisal edge lines up with the incisal edge of the adjacent tooth.
- 4.Check that the marginal ridge lines up and the crown matches the size, shape, and contour of the adjacent tooth.
- 5.If the crown is noticeably too large, move down a size and try again.
Tips
A passive fit means the crown drops into place and stays aligned. If you have to push it on, it is the wrong size or a ledge remains.
Cementation
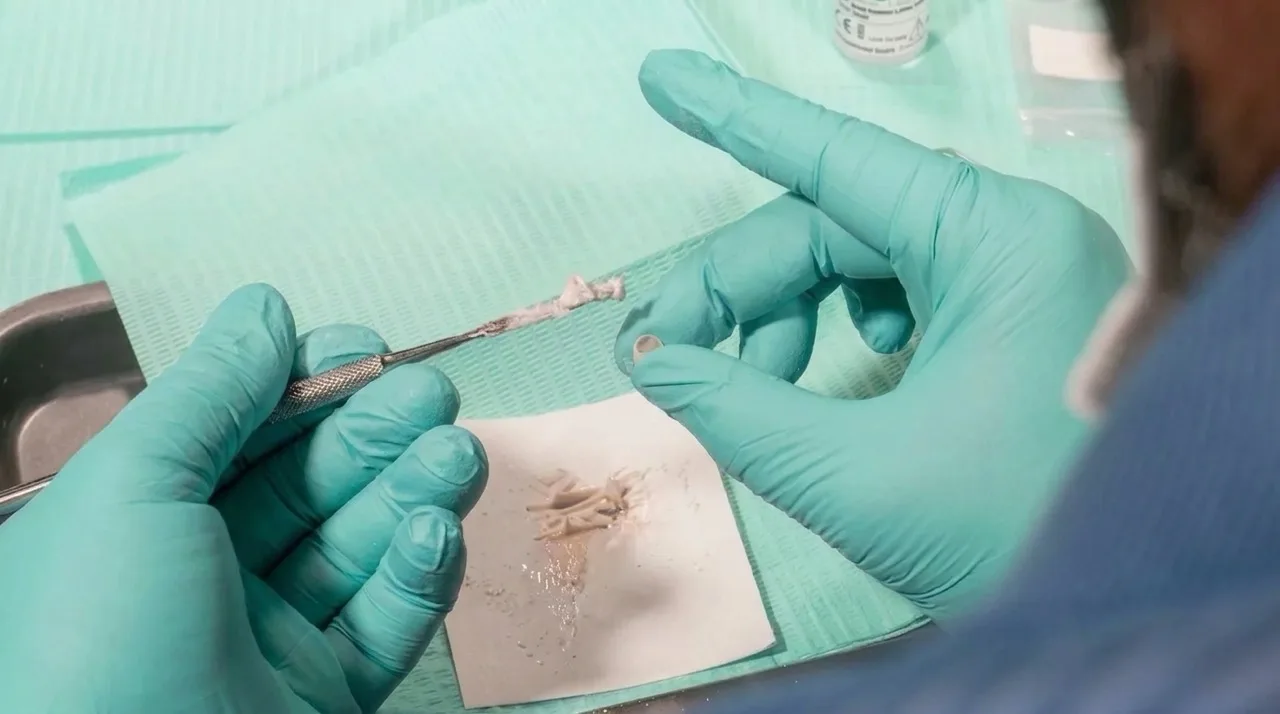
- 1.Clean the prepared tooth and prepare it for cementation.
- 2.Hand mix a pure glass ionomer cement to a thick, almost putty-like consistency.
- 3.Fill the crown with cement.
- 4.Seat the crown, making sure it is seated properly and seated fully.
Tips
Ketac glass ionomer as a luting agent has produced the best results, though any cement can be used for placement.
The thick putty-like mix helps hold the crown in correct position and keeps moisture and hemorrhage from re-entering the crown.
Caution
Moisture or hemorrhage inside the crown can cause staining to show through the zirconia.
Finishing
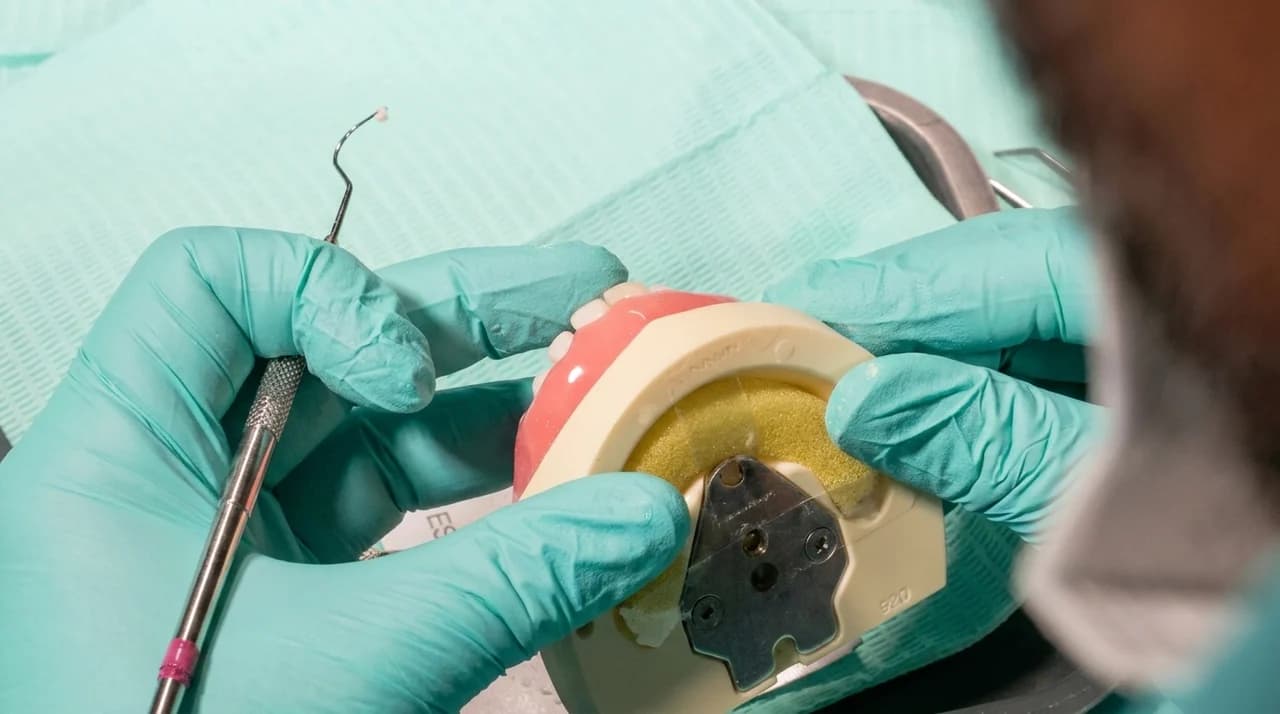
- 1.Use an explorer to clean excess cement from the proximal spaces.
- 2.Check the lingual as well and remove any excess cement there.
- 3.With a thick, putty-like mix you can remove excess almost immediately once the crown is fully seated.
- 4.If the mix came out runny, let it sit a minute or two before removing excess.
- 5.Verify the final result. The lingual should sit 1-2mm under the gingiva for a natural aesthetic finish.